In this article, you will learn the ins and outs of raising mealworms and how to provide them to the wild birds in your garden. While your friends might question your sanity when you start keeping bugs in your closet, every bird enthusiast will be envious of your endless mealworm supply.
* All photos on this page were taken by me unless otherwise noted. Please provide content and photo credits to thesouthernwildgarden.com.
** The Southern Wild Garden is supported by readers like you! Some links found on this website may be affiliate links, which means I may get a small commission, at no additional cost to you, if you buy a product through one of my links. And as an Amazon Associate, I earn from qualifying purchases through links to Amazon. I only recommend products that I use and love.
Why Mealworms?
So you have your basic bird feeder setup and are offering seed to the birds in your garden. But what started as an interest in watching and learning more about the common feathered inhabitants of your yard has now turned into an enthusiasm that has you wanting more. Sure you love the bright red northern cardinals, intrepid Carolina chickadees, and noisy blue jays that regularly visit your feeders, but what about attracting bluebirds, warblers, kinglets and perhaps even shy thrushes?
While your common backyard birds will always hold a place in your heart, you’ve honed your birding skills enough now to know there are other birds out there that you would love to attract to your yard and be able to observe up close. Many birds primarily eat insects, so offering mealworms as a food option at your feeder will bring some delightful new additions to your garden flock. Most of your seed eaters will also appreciate the availability of mealworms when it’s time to feed chicks. About 96% percent of all North American terrestrial birds rely on insects as a food resource for at least part of the year.
Birds love caterpillars
Most birds love to eat caterpillars, the larval stage of moths and butterflies (Lepidoptera). Many bird species also rely heavily on caterpillars to feed their chicks in the spring. A single pair of chickadees was reported to feed their nestlings over 6,000 caterpillars in a summer. Caterpillars provide birds loads of protein and fat, as well as important nutrients like calcium, potassium and nitrogen. Squishy caterpillars also provide lots of water, critical for hydrating nestlings who are not able to drink water yet. Researchers studying tits (European relatives of our chickadees and titmice) discovered that these birds time their breeding so their chicks will hatch when the local caterpillar population is at its peak. Studies have also found that birds nesting in urban areas with low caterpillar numbers raise fewer chicks compared those rearing young in a forest with abundant insects.
Caterpillars love native plants
Obviously, your bug loving birds will do best if provided with habitat that supports a diversity of insects. You should not be using pesticides in your garden if you want healthy and happy birds to live there. In addition, growing native plants for bugs to eat will benefit your birds. Researchers found that yards dominated by nonnative plants had lower insect abundance which in turn caused resident Carolina chickadees to raise fewer chicks. Most moths and butterflies lay their eggs on specific plants called host plants, and some native plants are preferred host plants for many species of Lepidoptera. You can find a list of the native plants in your area that host the most caterpillar species at The National Wildlife Foundation’s Native Plant Finder website. Some caterpillar favorites include oak trees which may host over 400 different species and native blueberries that host almost 200 species.
However, not everyone can add an oak tree to their garden. So, in addition to whatever native host plants you can accommodate in your yard, consider providing your birds insects in the form of mealworms. Granted, mealworms are beetle larvae and are not as nutritionally valuable as caterpillars, primarily because they contain less of the essential calcium required by nesting birds and growing chicks. But supplementing birds’ diets with mealworms has been found to increase the survival of chicks in studies on house sparrows and great tits in urban areas where insects are lacking.
Nutritional value of mealworms
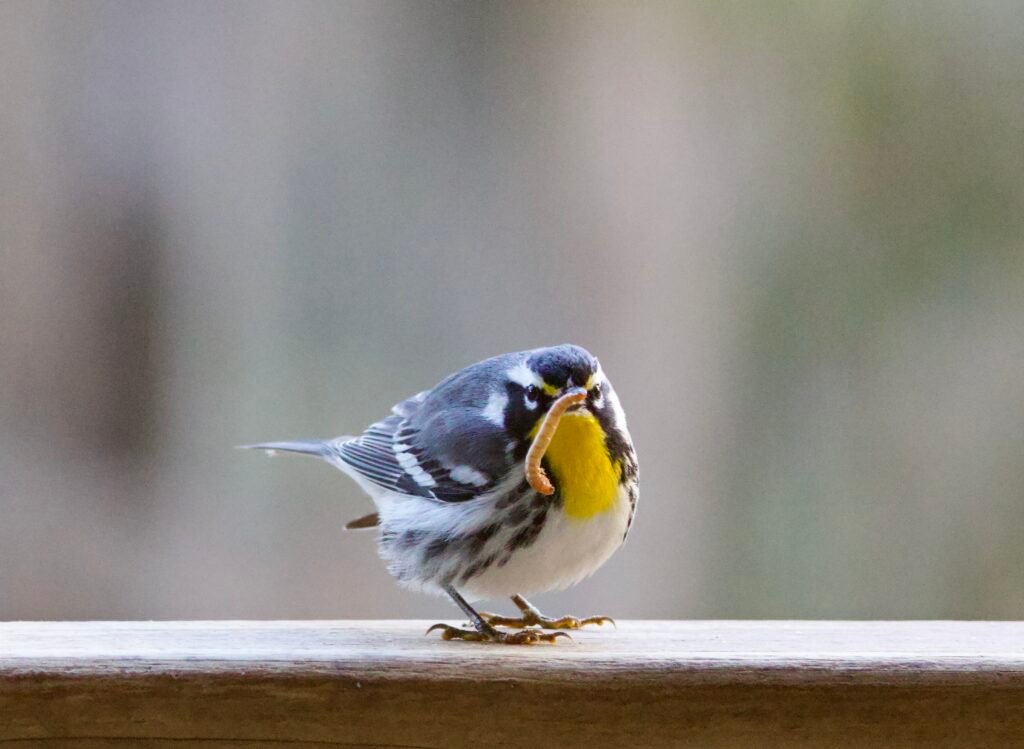
Generally, live mealworms are thought to be a healthy and beneficial food for songbirds when added to a diet that consists mainly of native insects and plants. And providing mealworms to your garden birds will be endlessly entertaining. Birds will try to fit as many mealworms in their mouth as they can at one time to take to a nest, and fledglings will beg for them at your feeder, mouths gaping and wings fluttering. With a little work on your part, you can provide your feathered friends with a consistent supply of protein rich mealworms.
What are mealworms?
Mealworms are the larval form of a species of darkling beetle. While there are about 19,000 species of darkling beetles worldwide, we are discussing Tenebrio molitor, the species most often raised for wild bird food. These darkling beetles are considered pests of stored grain and flour products and as such have been distributed worldwide through trade.
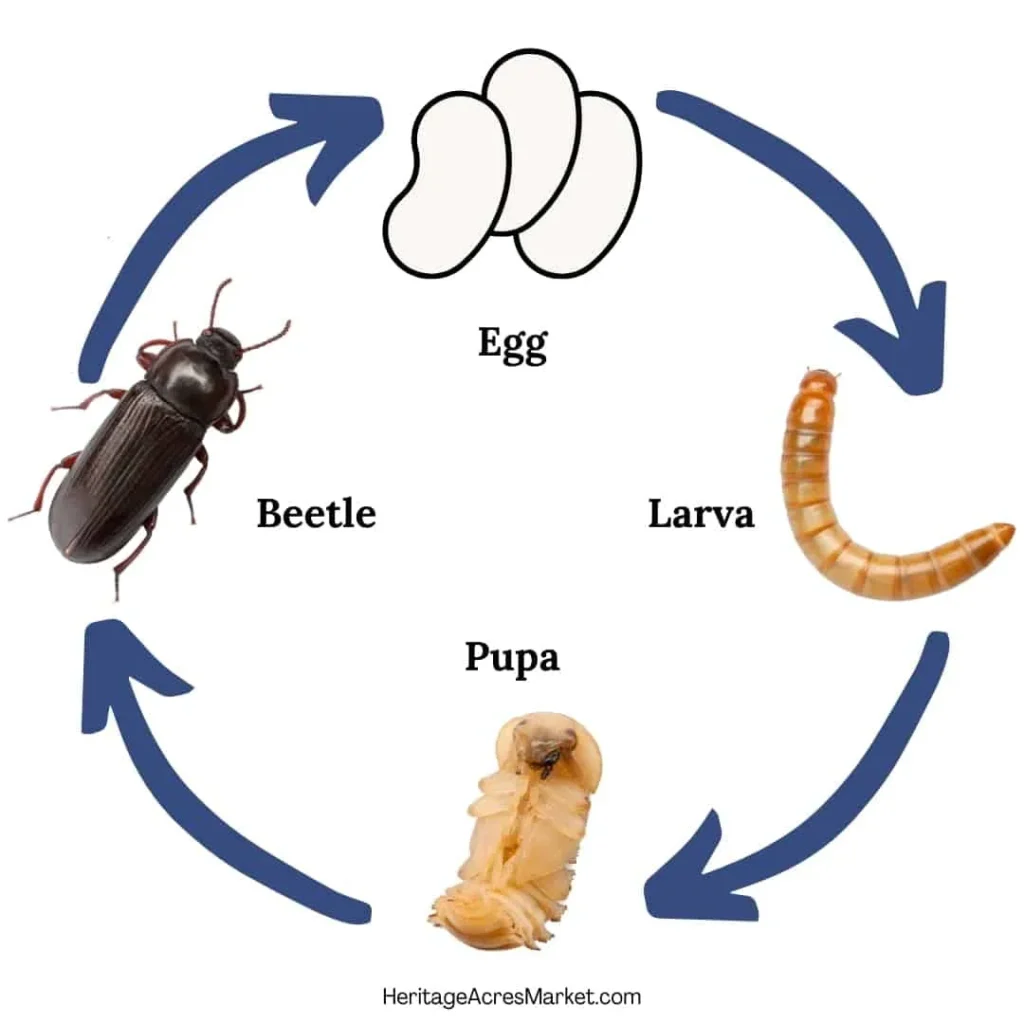
There are 4 stages in the life cycle of a darkling beetle: egg, larvae, pupa and the adult beetle. Adult beetles mate and lay eggs, which hatch into mealworms (larvae) that grow and eventually turn into pupae. Pupae metamorphose into the adult beetles and the life cycle continues. The time spent in each phase of development depends heavily on temperature, food availability and humidity.
Eggs
Female darkling beetles will lay about 300 tiny white eggs over its lifespan of 2-3 months. About the size of the period at the end of this sentence, eggs stick to the surrounding substrate are very difficult to see. Eggs hatch after 4-20 days to become mealworm larvae.
Larvae
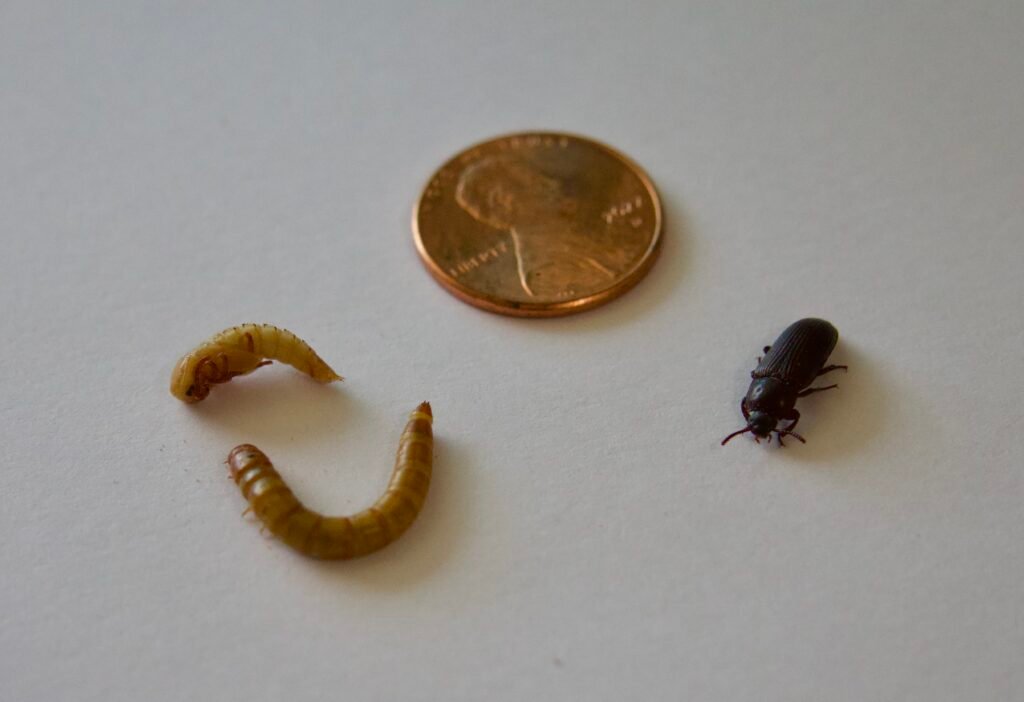
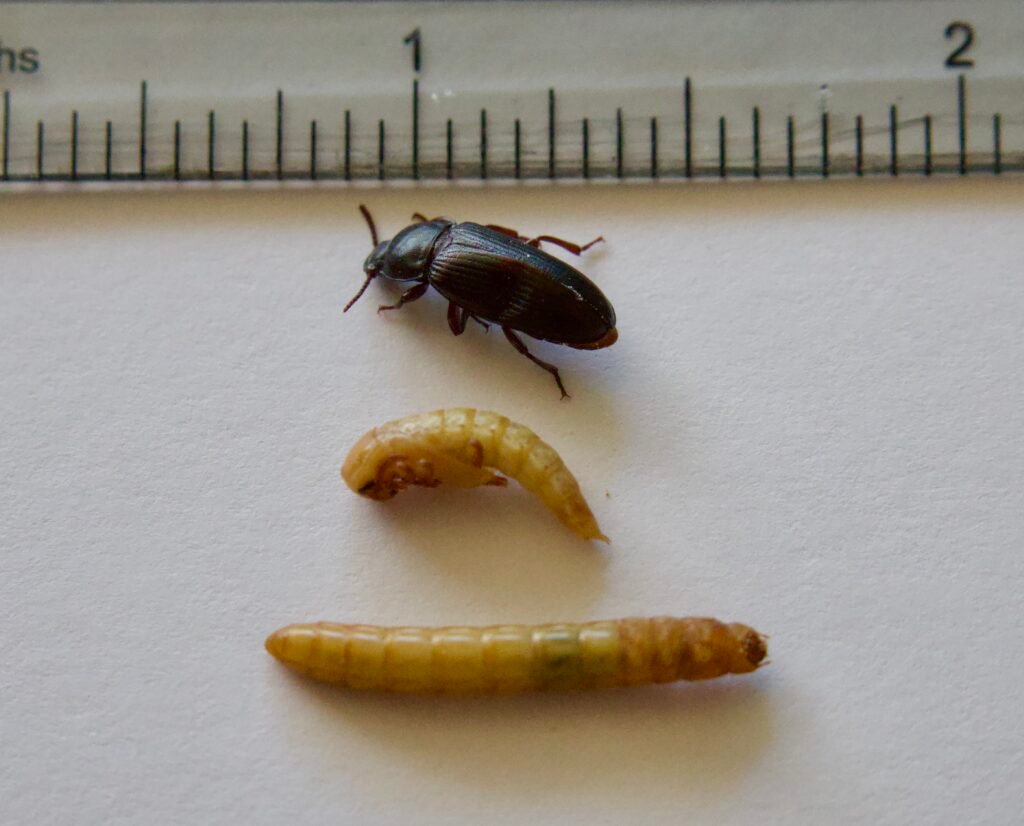
The larval stage is the phase of growth we are most interested in since this is what we will feed our wild birds. Eggs hatch into very tiny worm-like larvae. Larvae will shed their chitonous exterior many times as they grow into the inch long golden-yellow insects we think of as mealworms. Newly shed mealworms may appear white, but will turn yellow again once their exoskeleton hardens. Since they are insect, not worms, mealworms have six little legs at the front of their long body. Larvae live 2-3 months and are visible to the naked eye after about a week. Once they reach full size, if not fed to birds, mealworms will change into pupae.
Pupae
Mealworm pupae are white to light brown and sort of plump and teardrop-shaped. Pupae don’t eat or crawl, but they can wriggle a little bit. Some folks describe them as looking like little aliens or mummies. Honestly, they are a little creepy especially when they squirm about, so I get the comparisons. Mealworms will remain in their pupal stage from 2-4 weeks depending on the temperature and humidity, eventually turning into adult darkling beetles.
Beetles
Immediately after emerging from the pupal stage, beetles will be whitish in coloration. After a few days, as their exoskeletons harden, they will turn brown and then finally black. Once fully mature at about 12 days old, they will mate and adult female beetles will lay eggs, about 40 per day.
Adult beetles are about 0.5-0.75 inches long and males and females look the same. They have wings, but do not seem to be able to fly. The beetle stage is the last phase of the mealworms life cycle and ends with the death of the beetle after 2-3 months.
Time in each stage of mealworm lifecycle
| Egg | 4-20 days |
| Larva | 2-3 months |
| Pupa | 2-4 weeks |
| Beetle | 2-3 months |
| Starting colony to feeding mealworms to birds | 12 -16 weeks (3-4 months) |
How to raise mealworms?
Yes, your significant other as well as many friends and family may wrinkle their nose at the idea of bins of bugs living in your home. As I began my mealworm journey, I realized that while my husband understood my bird obsession and appreciated my enthusiasm to support our garden birds, he did not need to see the worms every day. Even better if he forgot they existed altogether. So my mealworms live in a closet rarely visited by anyone else. Until now, I have only shared the knowledge of my closet full of bugs with the very few folks who I know will love me despite what seems like a hobby gone too far.
As my mealworm colony has matured, I’ve come to realize that it is an easy and enjoyable little project that should be shared. For me and hopefully others, the rewards of raising mealworms for wild birds far exceed the costs of the work required and any potential embarrassment. With a few items, you too can grow bugs in your closet.
Purchasing Mealworms
You can buy live mealworms online, at a feed store, pet store, or at your local wild bird store. Buying mealworms is a good option if you just want to offer them for a few moths during the breeding season, or if you have an unlimited bird hobby budget. Live mealworms are expensive, so many folks will purchase dried mealworms for their birds. Dried mealworms lack the water found in live mealworms, obviously, and there is some concern that they may be unhealthy for nestlings to consume. Most of my birds won’t touch dried mealworms, while they will gobble down dozens of live ones in a matter of minutes. Luckily, mealworms are cheap and easy to raise at home, so I have a ready supply for my mealworm loving birds.
When purchasing mealworms to start your own colony, be sure to purchase live insects that have not been treated with growth hormones, as treated mealworms may not be able to reproduce. Avoid mealworms labeled as “giant” or “jumbo” as someone has likely tampered with them. Superworms are a completely different species of darkling beetle, Zophobas Morio. They are apparently more difficult to raise and friends of mine have told be they bite and escape their containers easily, so I’d recommend sticking with regular mealworms for your songbirds. I’d also recommend starting your colony with at least 1,000 mealworms. If buying online, realize some may be lost in shipping due to excessive heat, cold, or transit time.
Container
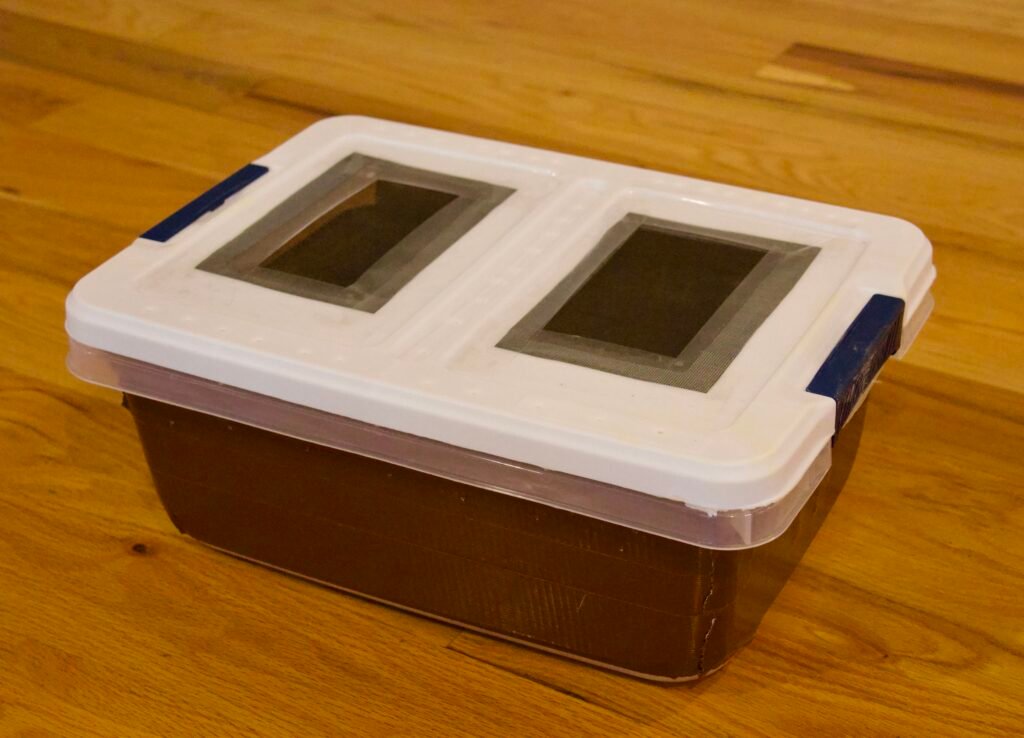
The first thing you’ll need for your mealworm farm is a container to keep them in. Generally, folks use a plastic storage bin or a glass aquarium. I use plastic as it’s lighter and easier to move and clean. The most important characteristic of the container is that it has smooth sides that won’t allow the mealworms or beetles to crawl out. One of the nice things about mealworms is that if you use the correct setup, they don’t tend to escape captivity, so you won’t find them loose around your house.
The size of the container doesn’t matter too much. You’ll want to make sure the container is deep enough to allow for 2-3 inches of substrate and at least an additional inch of open space below the top to prevent mealworms from escaping. I have a thing for these 15 quart storage totes from Lowe’s that are about 6 inches deep, 12 inches wide and 17 inches long. I just like them best for some reason.
Because they can’t really escape, you don’t necessarily have to put a lid on your container. However, living in the South, I have spiders and other bugs in my house that might eat my mealworms, so I protect my colony with a lid. A lid will also keep out other grain loving pests like moths.
Ventilation
You will need to make sure your container has adequate ventilation. While mealworms require some humidity, too much will allow mold to grow in your substrate which is harmful to your bugs. Ventilation is easy to add by either punching or drilling holes in the lid or cutting out a section of the lid and replacing it with screen. The softer plastic lids are nice as they don’t crack when cutting or drilling holes. If condensation forms within your container, you need more ventilation.
Substrate and Food
The substrate you use in your container acts as bedding as well as food for your mealworms and beetles. While almost any type of grain will work as a substrate, the two most commonly used are wheat bran and rolled oats. I have tried both in my colony and prefer wheat bran as the insects seem healthier and the mealworms are easier to sift from the substrate. One research paper I found supported wheat bran as a better option for raising your mealworms.
Grain mites
If you do not buy grain that is labeled as suitable for human consumption, you will want to treat the substrate for pests prior to putting it into your containers. Grain mites (Acarus spp.) are a real problem. They negatively affect the health of your mealworms and will destroy your colony. To ensure your grain is mite free prior to adding it to your mealworm colony, you will want to heat the grain so it reaches 140 degrees F for at least 10 minutes to kill any mites or mite eggs. The recommendations for doing this are varied, but you will want a method that heats all the grain without burning it.
I spread my wheat bran on a baking sheets and heat it at 200 degrees F for at least 35 minutes. Freezing your substrate to kill mites will only work at subzero temperatures. Some folks microwave their substrate, but I have never tried this method. In all cases, make sure your substrate it is back to room temperature prior to using it in your mealworm containers. There is no way to completely get rid of mites once they have infected your colony. Mites thrive in high humidity environments, so keeping your container well ventilated is key to keeping mites away.
Water
In addition to providing grain for your mealworms to eat, you will also need to provide water. Generally, to meet this requirement, folks provide their mealworms and beetles with fruits or vegetables. Vegetables provide both water and nutrients to your mealworms. Carrots, apples, potatoes and cabbage are a few of the most commonly used vegetables. I provide my mealworms slices of peeled carrot once or twice a week. The amount of veggies you add to your colony will depend on the number of insects you have as well as their stage of development. You will want to make sure you provide enough to meet their moisture requirements without making the environment in your container too humid and encouraging mold.
Environment
Mealworms are picky about the environment they need to grow and reproduce at their best. They like it dark, warm and humid, but not hot and not damp.
Temperature
The ideal temperature to maximize growth is about 72 – 81 degrees F. Temperatures above 86 F and below 62 F will negatively impact growth and reproduction. You will notice delayed maturity of larvae and pupae at colder temperatures. Extended exposure below 40 F may kill your mealworms.
Humidity
Your beetles will lay more eggs and your mealworms will grow bigger if they have the correct amount of moisture. Adding vegetables to your container will provide a lot of the humidity required to keep your bugs healthy and happy. Moisture also reduces the likelihood that your bugs will cannibalize each other. Apparently, beetles and larvae will eat eggs and pupae.
Relative humidity should be between 55% and 80% with 70% considered ideal. While some serious mealworm farmers monitor their colony’s humidity, I gauge general moisture levels by watching for any signs of condensation and the rate at which my mealworms eat their carrots. Since I live in the southeast, I tend to have issues with too much moisture rather than not enough. I do, however, notice my mealworms require more veggies in the winter months when we run the heat in our house.
Light
Darkling beetles tend to prefer the dark. Some folks recommend darkening the outside of plastic containers either with tape or paint to provide a dimmer environment. While my mealworms and beetles will dig down into the substrate when exposed to direct light, I haven’t come across anything that suggests light is bad for them. I do keep my mealworms bins in a closet.
Maintenance
Cleaning
In addition to keeping your mealworms fed and watered with adequate grain and vegetables, you will need to clean your containers every once in a while depending on the number and activity of the bugs in your bins. As worms and beetles eat their substrate they create frass, which is apparently just a fancy name for bug poop. Other debris like shed exoskeletons and dead insects will also accumulate in your bin. Some folks report an ammonia smell to their containers when they need to be cleaned.
At some point, you’ll note that the amount of waste in the container should be addressed. To do this, you’ll need a fine mesh sifter to separate the frass from the mealworms and remaining grain. The size of the mesh you use will depend on type of substrate in your container but 1/8 inch is recommended. Wash your bins and add new bedding after removing frass. Depending on your colony’s stage of growth, the frass may contain eggs and tiny mealworms. If you suspect it may, you can keep the frass in a separate container for a week or so with a couple of pieces of carrot and then sift the frass again to hopefully salvage any babies.
Frass is full of nutrients that you can use as fertilizer in your garden if so inclined. Frass is dusty and has been linked to asthma attacks in mealworm farm workers. If you have any respiratory issues, you may want to use a mask when cleaning or sifting your mealworms.
Colony Cycling
With just a single container for your colony, you will be able to raise mealworms. However, many folks choose to have multiple bins for a variety of reasons. First, is to reduce cannibalism by separating the beetles from the other life stages. Second, it can be easier to sift out mealworms to use if you don’t have them mixed in with beetles. And finally, you can have colonies of different ages going at once which will allow you to have fully grown mealworms to offer your birds more continuously.
There are various ways to setup a multi-bin colony. I just have three separate bins: one for beetles and two for mealworms at different stages of growth. Others use more bins or even a stacked system that allows eggs to fall through the top beetle bin into a nursery bin below. The nursery bin is then rotated with other bins once the eggs begin to hatch. As mealworms turn into beetles, they are moved to the top beetle bin to keep egg production going.
An internet search will reveal a wide variety of creative ways people grow and manage their mealworm colony. Don’t be afraid to experiment a little and find what works best for you and your needs. However, keeping things simple might be all you need to keep your songbirds supplied with mealworms throughout the year.

Storage
Once your mealworms are fully grown, you will want to harvest some of them before they all turn into pupae and then beetles. Allow enough larvae in your bin to turn into beetles to keep the colony going, but be sure to harvest most to feed your birds.
Mealworms can be kept in the fridge for months. The cold temperature slows their growth and prevents them from turning into pupae. Keep them in a small plastic container with holes for ventilation. Once a week or so, pull them out of the fridge, let them warm up, and give them a piece of carrot or whatever your preferred vegetable may be.
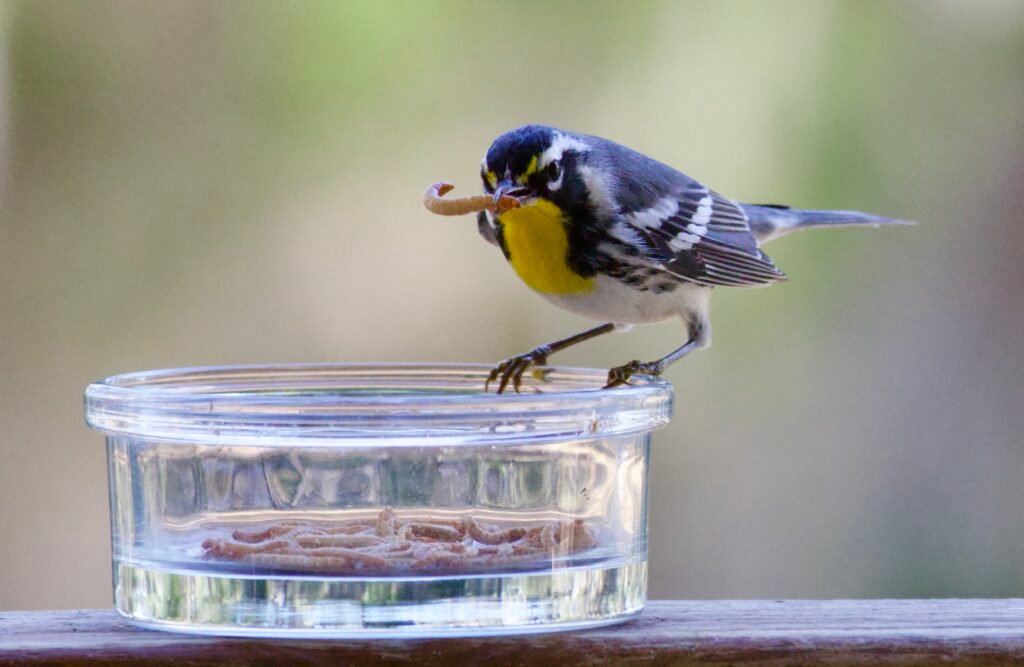
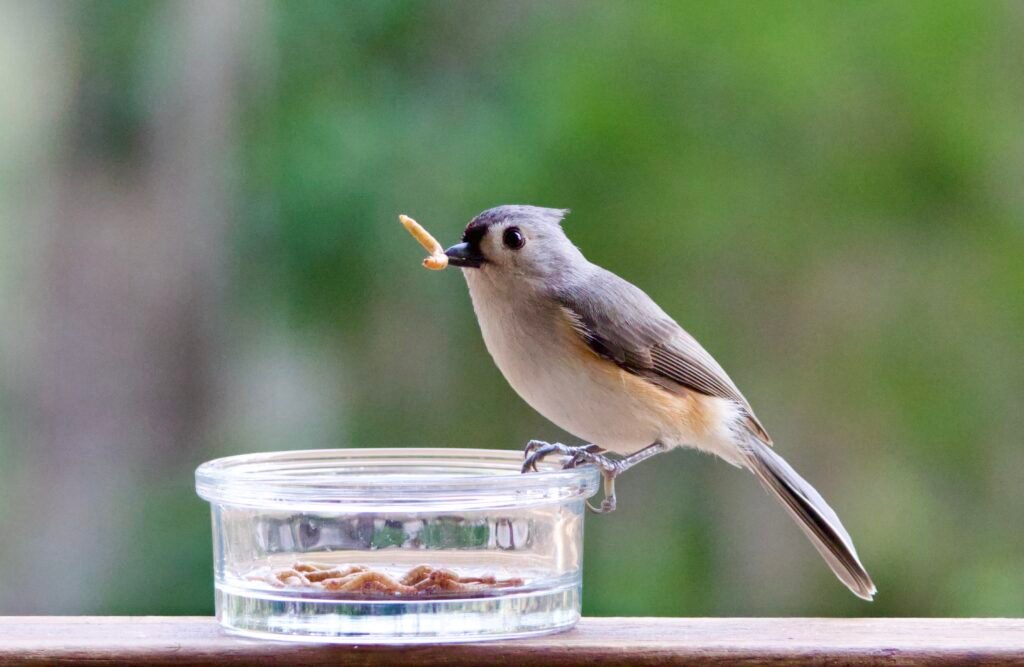
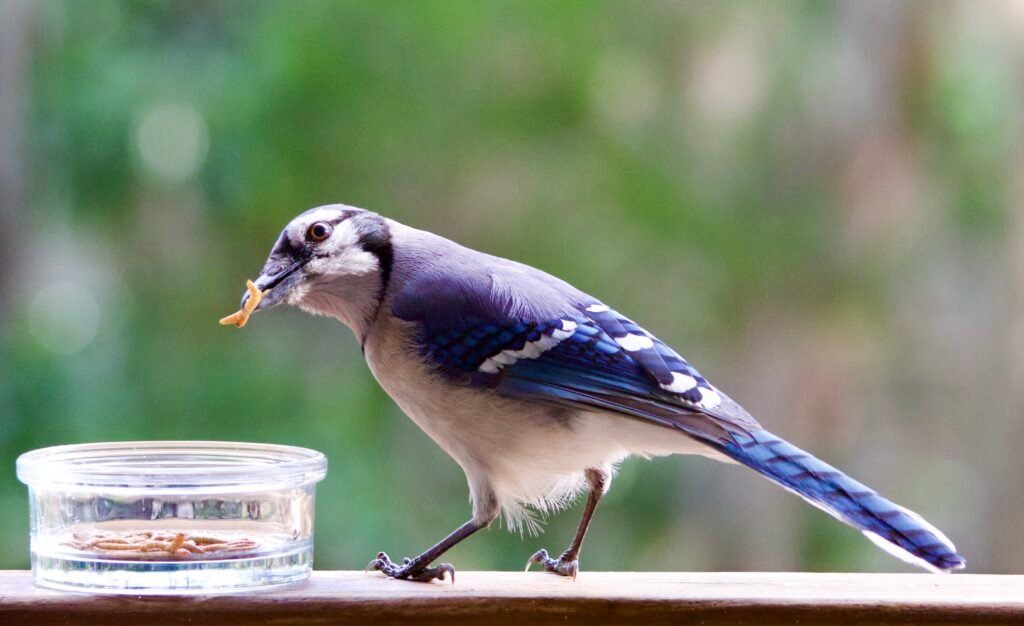
How to offer mealworms to birds?
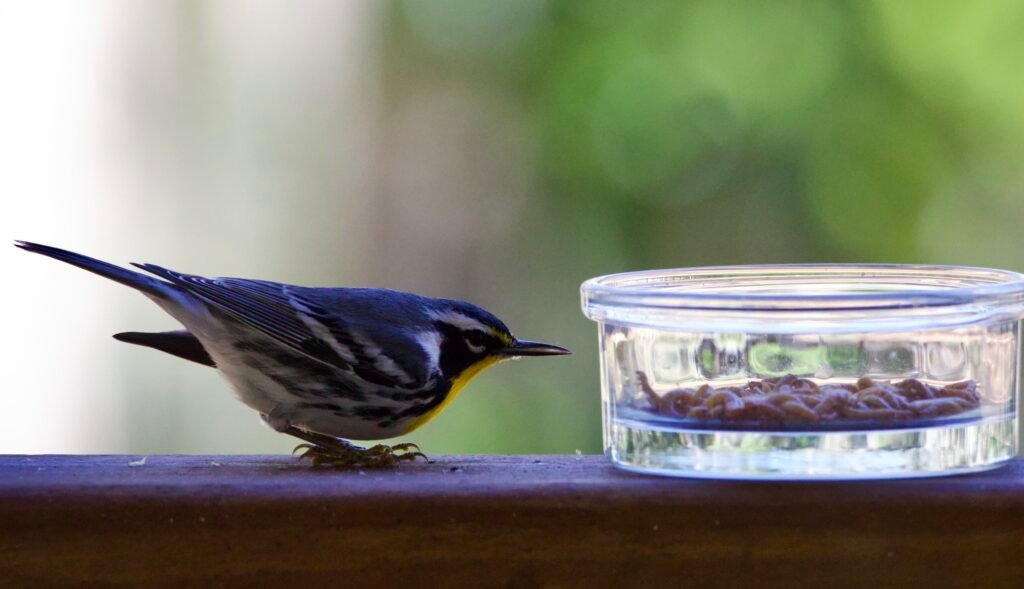
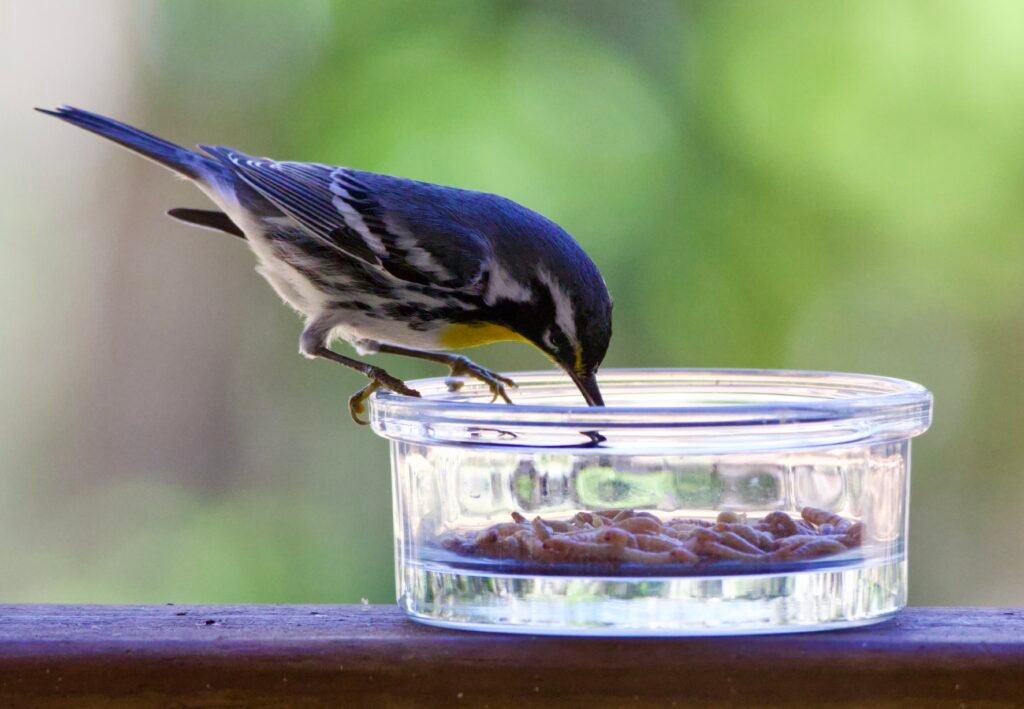
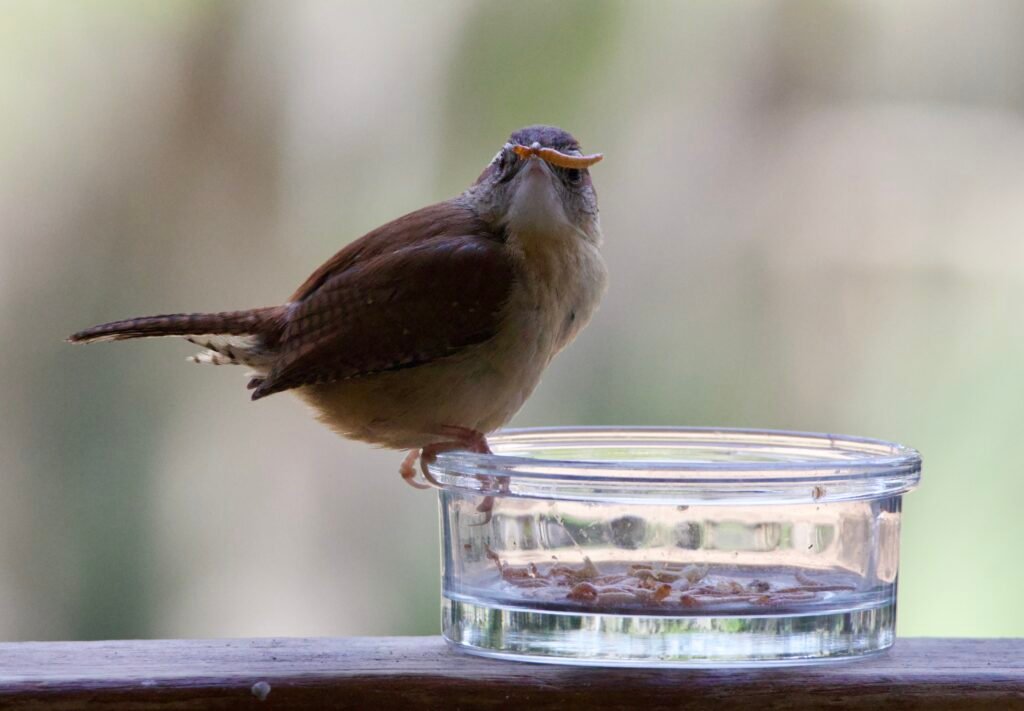
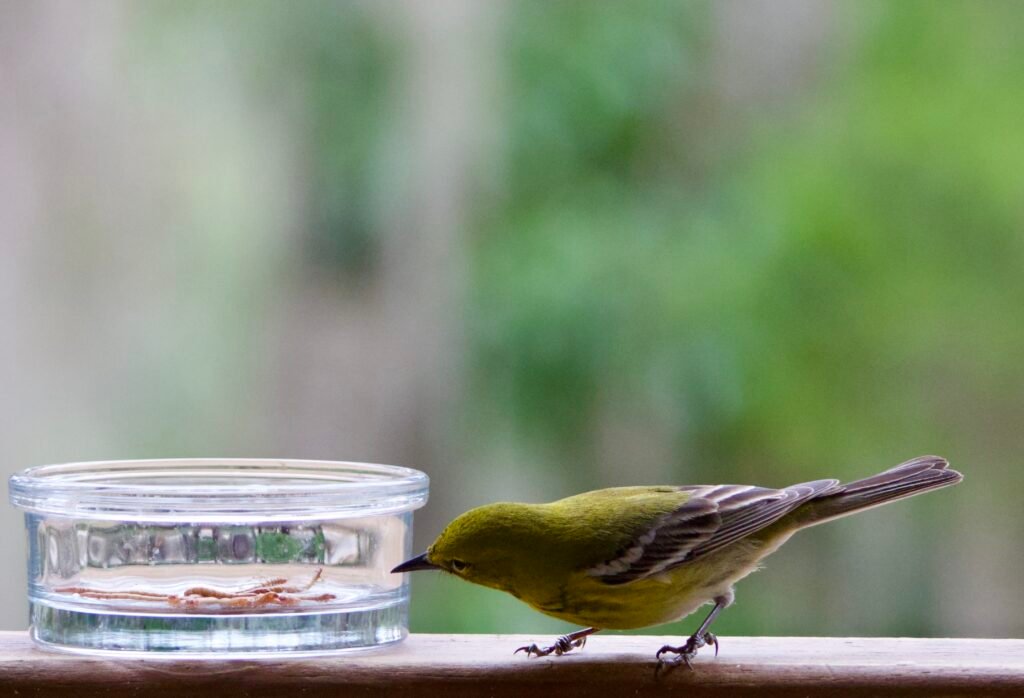
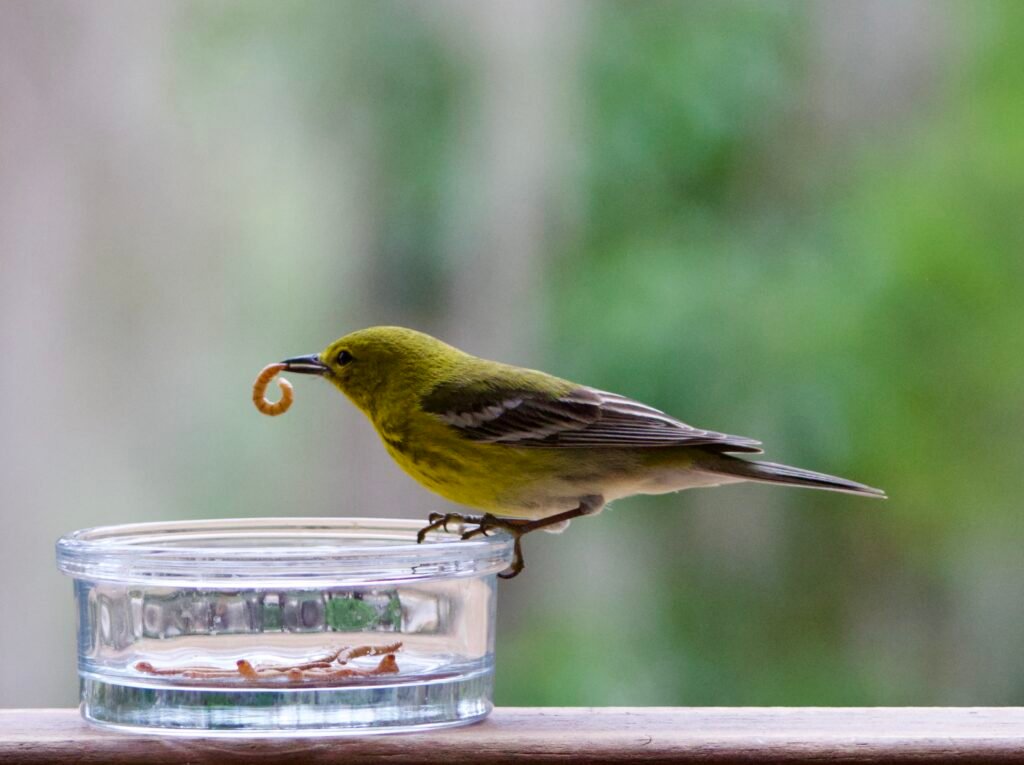
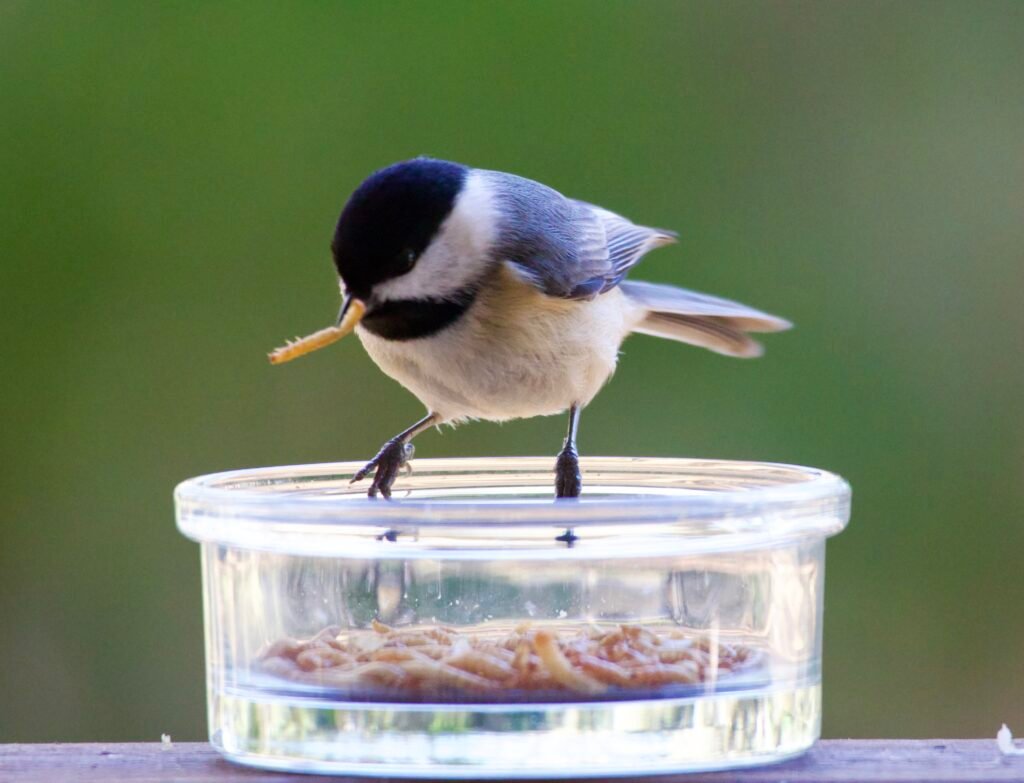
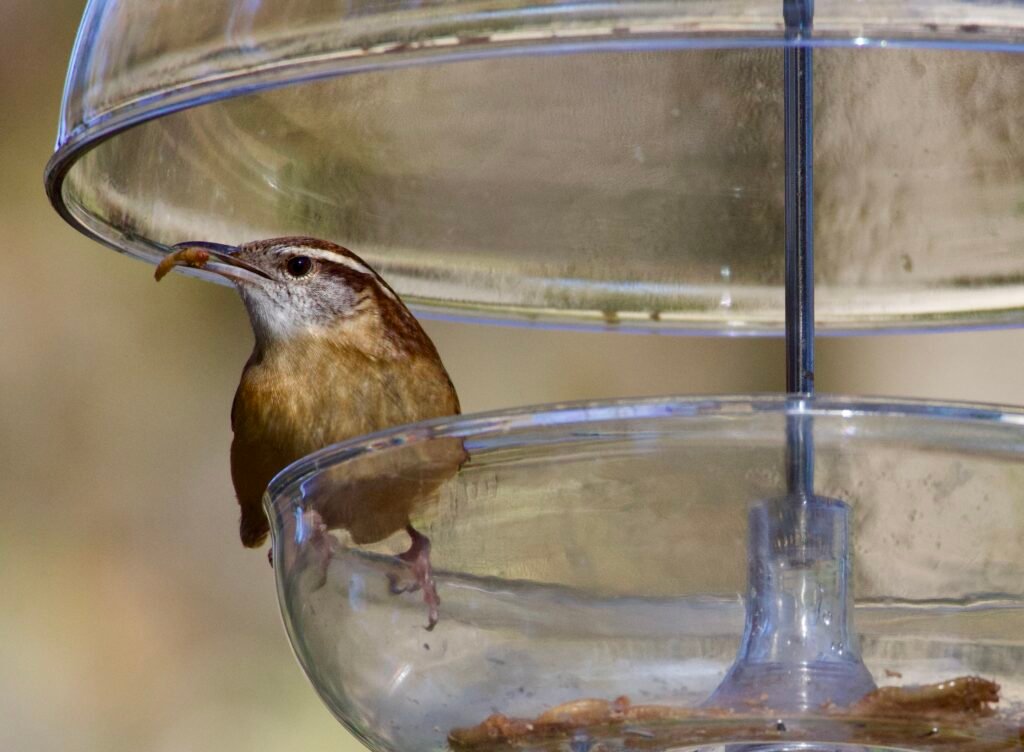
As with your colony bins, mealworms are best placed in smooth plastic or glass containers to offer to birds. This will prevent them from climbing out and escaping prior to being eaten. Simple glass dish feeders work very well. I also like this domed plastic feeder by Droll Yankees, although it is sized for smaller birds and the drainage holes are too large. I had to fill the holes with glue to keep the mealworms from getting out.
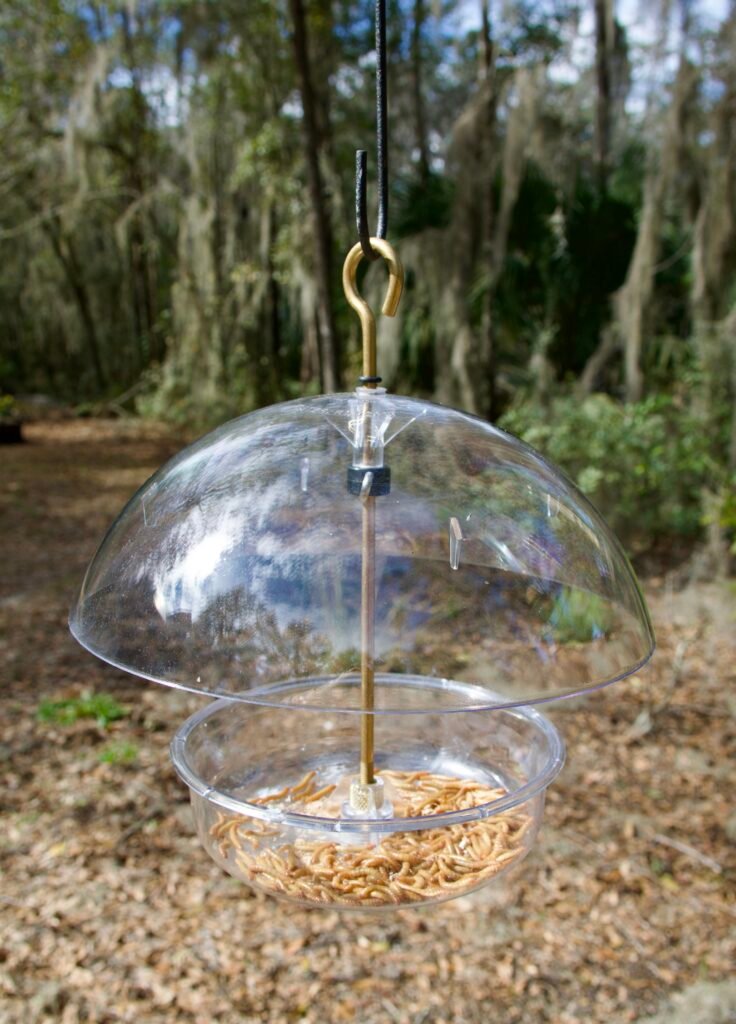

A few considerations when choosing a mealworm feeder. First, drainage holes are a nice idea, but most are too big and your mealworms will wriggle through them. Without drainage holes, your mealworms will drown if the feeder fills with water. You can help prevent this by adding a dome or just not putting mealworms out if it is going to rain in the near future.
Your mealworms will also die if it is too hot or too cold outside. In the South, direct sun in the summer months will cook your mealworms. Consider putting them out early in the day when temperatures are predicted to be over 85 degrees F in the afternoon.
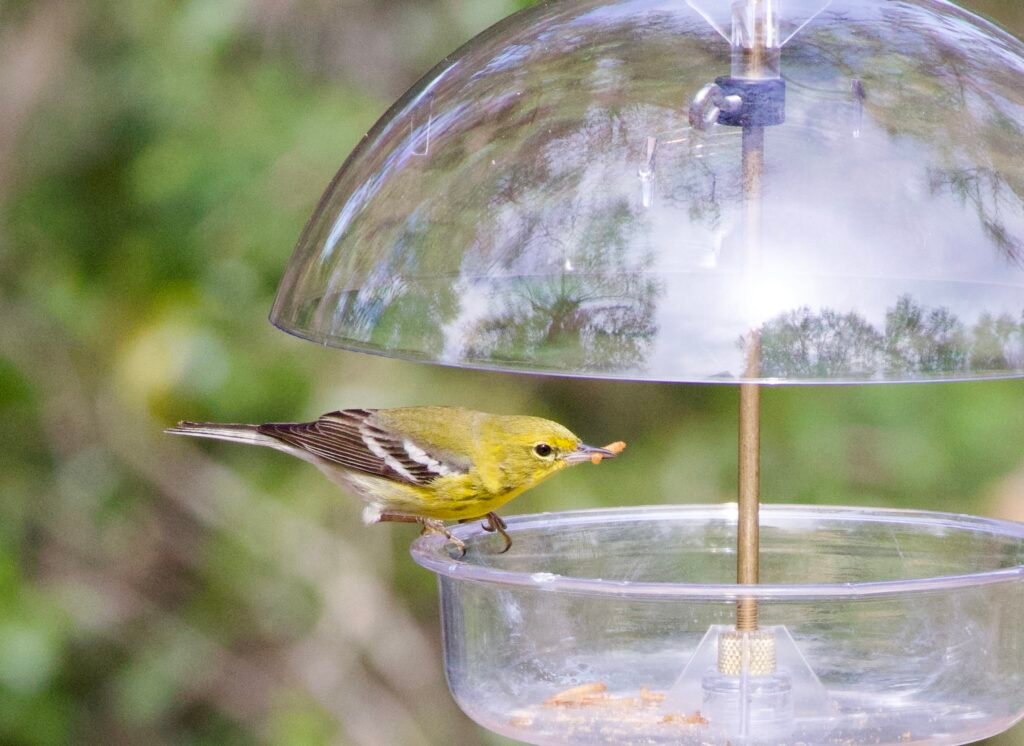
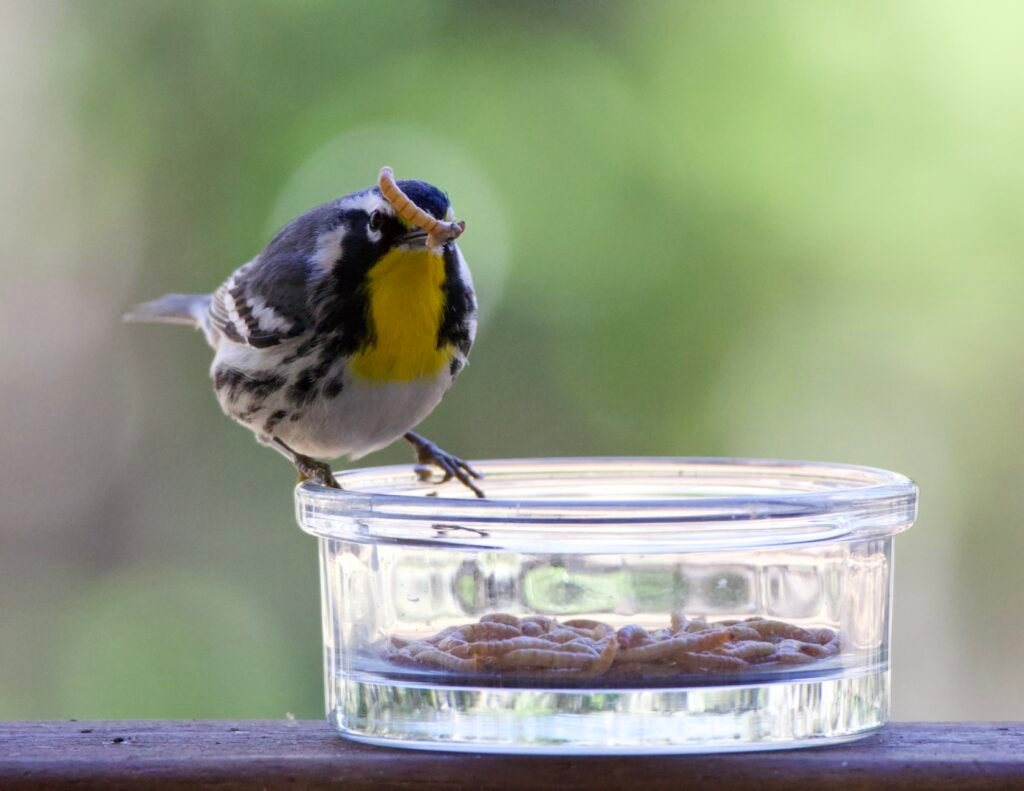
Once birds find your mealworms feeder, they will usually eat them very quickly, especially during the breeding season. While this is good, you may want them to last a little longer by restricting the birds you let have access to your mealworm feeder. Larger birds will gobble down your mealworms before your little birds have a chance to get any. Since I put mealworms out specifically in the hopes of attracting small insectivorous birds like warblers and bluebirds, I prefer a feeder that has an adjustable dome, like the Droll Yankees feeder above, that lowers to discourage large birds from perching on the feeder. You can also use a wire enclosure to keep bigger birds off your mealworm feeder, but I find the wire reduces visibility.
Supplements
You may also want to increase the nutrient value of your mealworms prior to providing them to birds by adding supplements to your colonies. This is called gut loading your mealworms and is used frequently by folks raising mealworms to feed to exotic lizards and geckos and such. In particular, you may want to add calcium to your mealworms when birds are feeding chicks. The pet industry makes products that you can buy, like this high-calcium mealworm diet. Folks have also reported adding poultry starter for chickens, finely ground eggshells, and powdered calcium carbonate to their mealworms diets.
Want to learn more?
- Heritage Acres Market: How To Start A Mealworm Farm: A Comprehensive Guide For Beginners by N. Gennetta
- University of Florida Entomology Department: Introduction to the Darkling Beetle Tenebrionidae
- Wild Birds Unlimited: Mealworms – Separating Truth from Misguided Information by D. Gleason
- North American Bluebird Scociety Factsheet: Mealworms
- Sialis: Raising Mealworms: Everything you always wanted to know (and more)
- Foods 2020: Growth Performance and Nutrient Composition of Mealworms (Tenebrio Molitor) Fed on Fresh Plant Materials-Supplemented Diets by Liu, Masri, Perez, Maya, and Zhao.
- Microbiome 2023: Gut microbiome of mealworms (Tenebrio molitor Larvae) show similar responses to polystyrene and corn straw diets by Mamtimin and others.
- Animals 2020: Mealworm (Tenebrio molitor Larvae) as an Alternative Protein Source for Monogastric Animal: A Review by Hong, Han and Kim.
- The Journal of Allergy and Clinical Immunology: Mealworm asthma: clinical and immunologic studies by Bernstein, Gallagher and Bernstein.
- Journal of Animal Ecology 2020: Food availability limits avian reproduction in the city: An experimental study on great tits Parus major by Seress, Sandor, Evans, and Liker
- Ecological Applications 2018: Impact of urbanization on abundance and phenology of caterpillars and consequences for breeding in an insectivorous bird by Seress and others.
- Journal of Avian Biology 2018: Supplemental food alters nest defense and incubation behaviour of an open-nesting wetland songbird by Vafidis and others.
- Animal Behaviour 2014: Phenotypic plasticity in hormonal and behavioural responses to changes in resource conditions in a migratory songbird by Kaiser, Sillet, and Webster
- Ecology and Evolution 2017: Happy to breed in the city? Urban food resources limit reproductive output in Western Jackdaws by Meyrier and others
- Bird Study 2014: Supplementary feeding of mealworms success in garden nesting House Sparrows Passer domesticus by Peach, Sheehan and Kirby.
- Scientific Reports 2017: Integrated behavioural and stable isotope data reveal altered diet linked to low breeding success in urban-dwelling blue tits (Cyanistes caeruleus) by Pollock and others.
- Ibis: Tits and their caterpillar food supply by C. Perrins
- Ornithological Applications 2021: Are declines in insects and insectivorous birds related? by Tallamy and Shriver
- PNAS 2018: Nonnative plants reduce population growth of an insectivorous bird by Narango, Tallamy and Marra
- WFSU Ecology Blog: Bang for your caterpillar buck: which plants host the most? By De Villegas
Wow, this opened up a whole new world for me in bird feeding. Who knew that you could grow your own mealworm colony. Super informative.
Pingback: The Southern Wild - How to Attract Ruby-crowned Kinglets
Pingback: The Southern Wild - Attracting Yellow-throated Warblers
Pingback: The Southern Wild - Best Bird Feeder Setup for Beginners